Timeline
Keyframes and automation
Change a clip's gain or an effect's settings over time.
Automation draws a value over time with keyframes. Between two keyframes the value moves along a curve; after the last one it stays put. It is how you fade a cue in on the build, sweep a hue through a chorus, or pulse an effect on the beat.
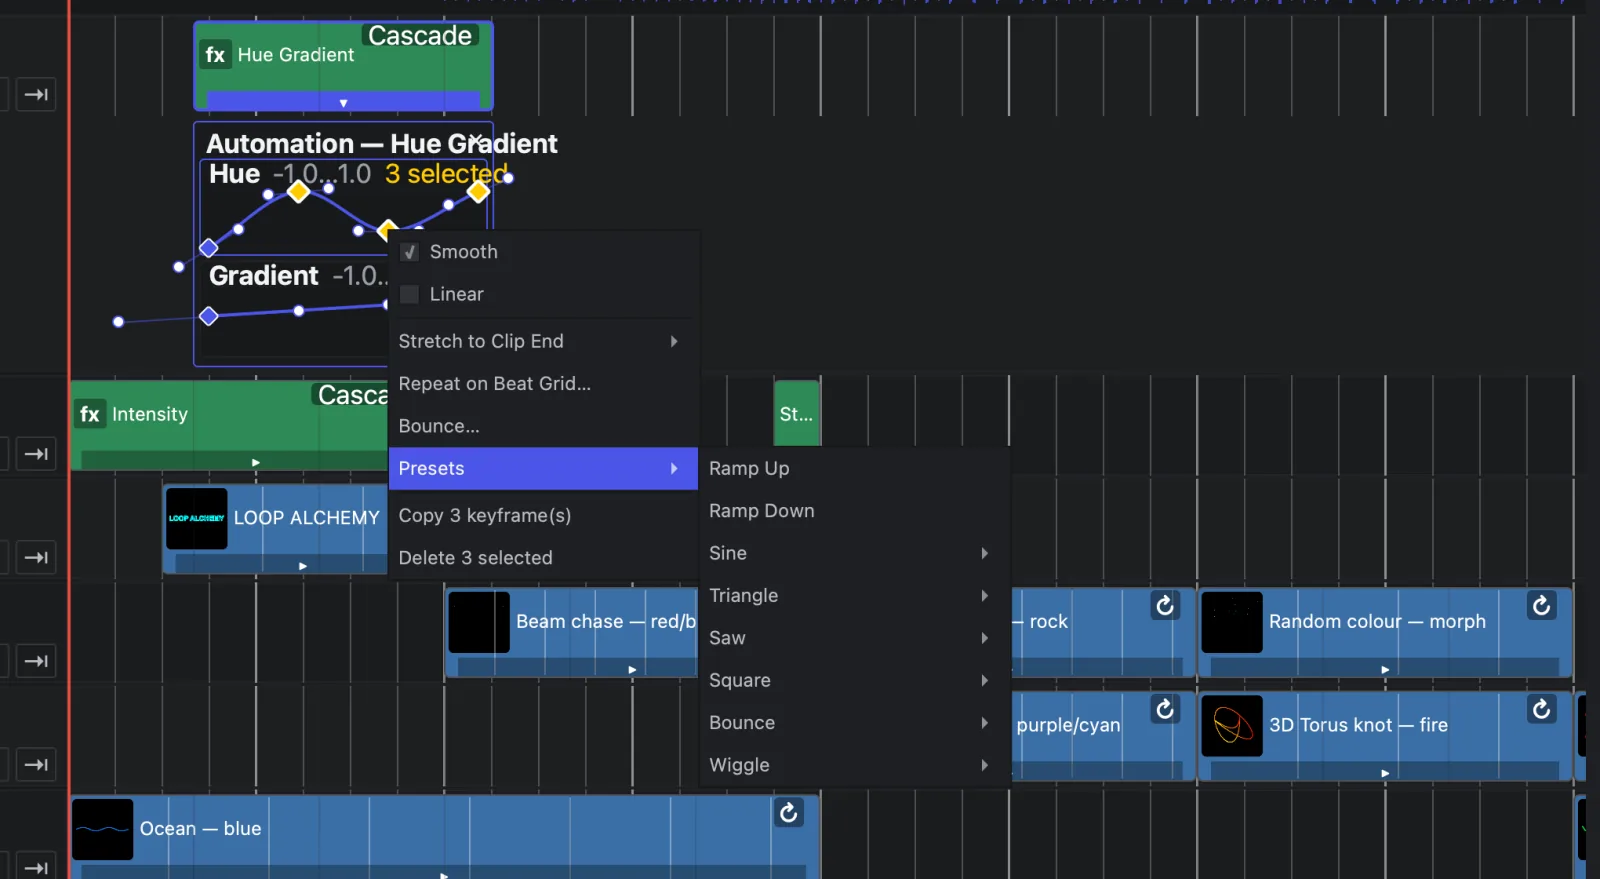
What you can automate
| Lane | Where | What it changes |
|---|---|---|
| Gain | Cue, nested timeline and laser stream clips | The clip's brightness, 0 to 1. Overrides the Gain slider |
| One lane per parameter | Effect clips | The effect's settings. See Timeline effects |
| Opacity | Every laser track | Everything on the track. See Track opacity |
Keyframes belong to the clip and move with it. They use the clip's own time, so a clip copied to another place in the show brings its automation along.
Choice parameters (an effect's palette, pattern or chase map) are steps, not curves: each keyframe holds its choice until the next one.
Add and edit keyframes
Click the bar along the bottom of a clip (Show/hide automation) to open its lanes under the track. A locked clip's automation is read-only.
| To | Do this |
|---|---|
| Add a keyframe | Double-click the lane. It snaps to the beat grid |
| Add a choice keyframe | Right-click a choice lane → Add Keyframe Here…; Set Choice… changes one |
| Select | Drag a box across lanes; Shift adds; Shift-click toggles one keyframe |
| Curve shape | Right-click → Smooth (with handles to drag) or Linear |
| Copy, paste | ⌘C / Ctrl+C, then ⌘V / Ctrl+V pastes at the playhead. The clipboard works across clips |
Shape tools
Select some keyframes, then right-click one:
| Tool | What it does |
|---|---|
| Stretch to Clip End | Rescales the selection in time so it ends at the clip's end: Keep the First Keyframe where it is, or Fill the Whole Clip from the start |
| Repeat on Beat Grid… | Copies the selection again and again to the clip's end, every N beats. Move the pointer to pick the interval, click (or Return) to apply, right-click (or Esc) to cancel. Keyframes after the selection are replaced |
| Bounce… | Turns the selection into there-and-back cycles within its own span. Bounces sets how many; Repeat to the clip end keeps going |
| Presets | Replaces the lane with a shape over the whole clip: Ramp Up, Ramp Down, Sine, Triangle, Saw, Square, Bounce or Wiggle, one cycle every ½ beat, 1 beat, 2 beats or 4 beats |
Presets run between the lane's full range, or between the values of the selected keyframes when two or more are selected. Beats are measured at the beat section's BPM (see Markers and sections).
Example: pulse a cue on the beat
- Open the cue clip's automation.
- Right-click the Gain lane → Presets → Saw → 1 beat. The clip now flashes on every beat of the section.
- To keep some light between the flashes, select two keyframes of different heights first, so the preset runs between them.
Track opacity
▸ in a track header opens the track's Opacity lane, edited like any other lane. It fades every clip on the track together, on top of each clip's own gain: use it for a section-long fade without touching the clips.
A clip's Xfade (in the clip bar) also applies on top of any gain automation, and is the quickest way to soften cuts between clips.