Timeline
Exports and mixdowns
Render a timeline to a file, or package it as a show for Show Alchemy.
A mixdown renders a timeline's laser output to a file: one track per laser, plus the music,
timecode and video if you want them. A show package wraps a mixdown into one .xshow file that
Show Alchemy plays on any rig.
What a mixdown holds
- One track per laser. Each projector you tick becomes a 6-channel track: x, y, red, green, blue and a 6th channel you choose. The samples are the points the projector would receive, after zones, geometry, Power Map, scan rate and projector settings. One sample per point: 48 kHz is 48,000 points per second.
- Music (optional): the timeline's music file.
- Timecode (optional): an LTC track that starts at the timeline's Start TC.
- Video (optional): the timeline's video tracks, as the video player shows them.
Renders run in the background, on a copy of the workspace taken when you click Render now or Add to queue. Later edits don't change a queued render. The live output is not touched.
Export a mixdown
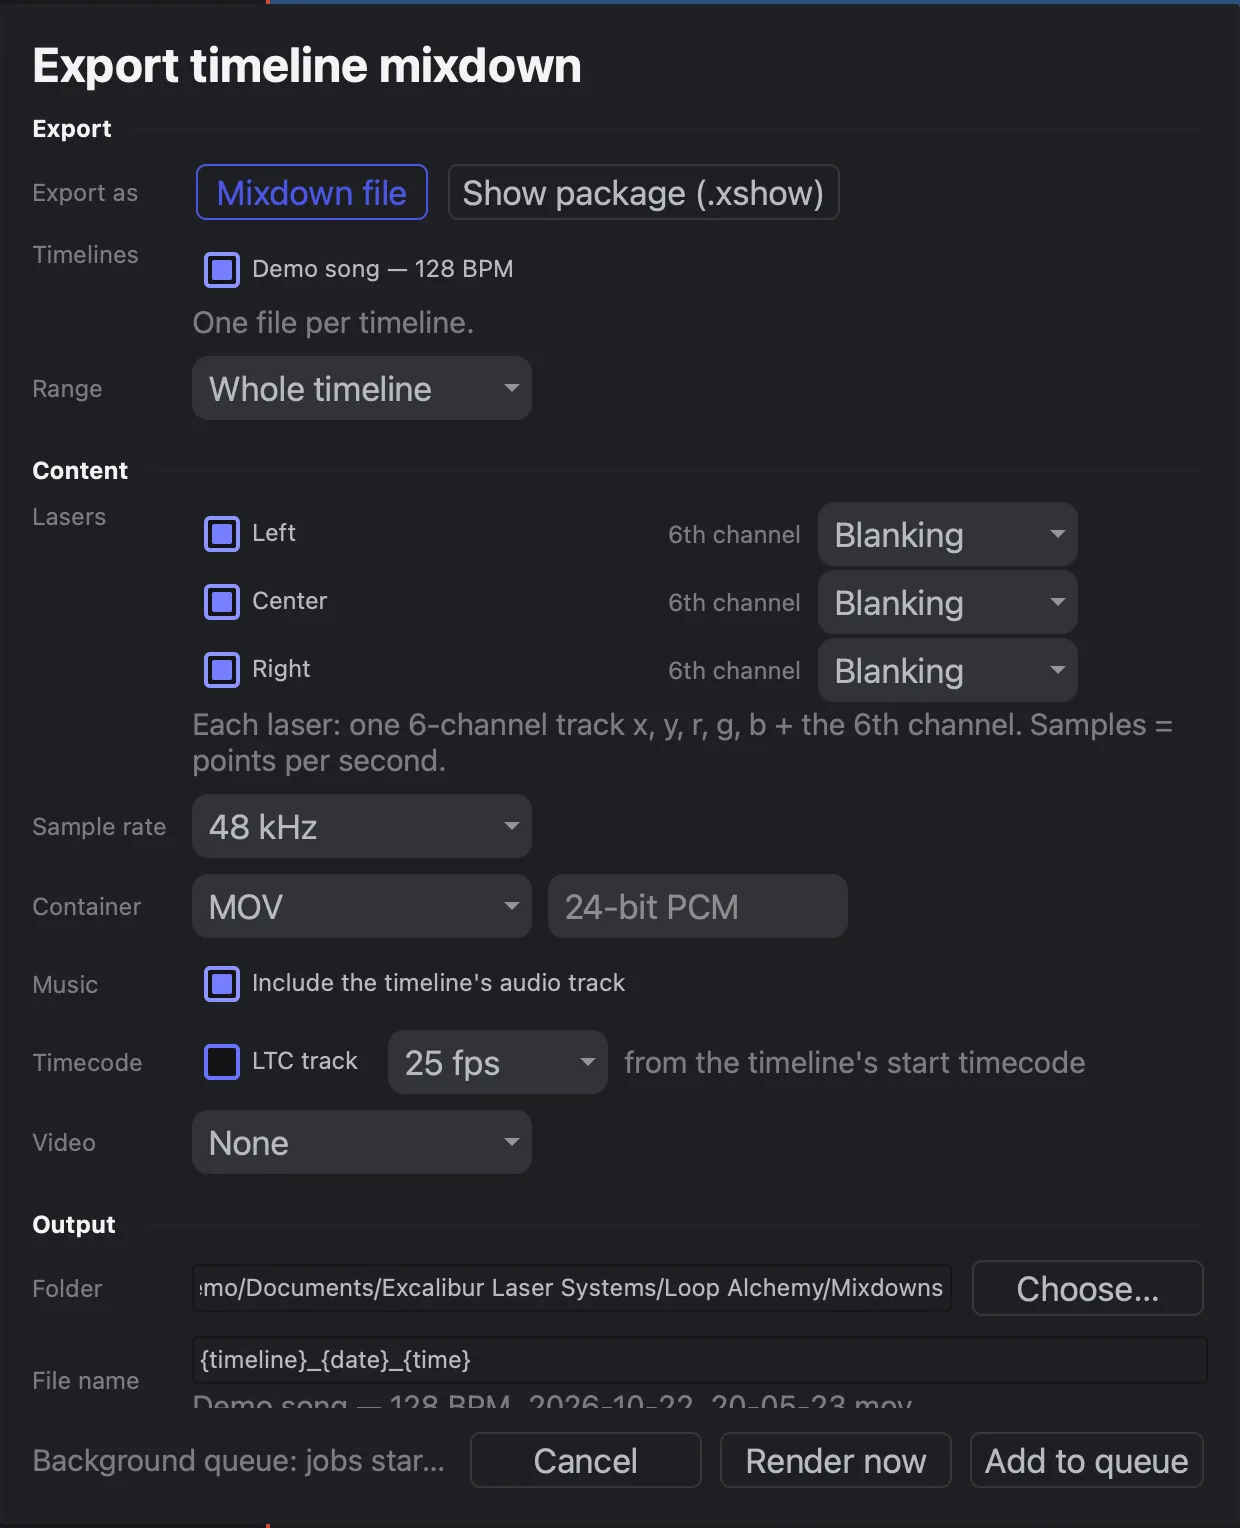
- Choose Render → Export timeline mixdown…, or Export mixdown… on the Timelines page.
- Export as: Mixdown file.
- Tick the Timelines to render (one file each) and the Range: Whole timeline, or In / out (seconds).
- Under Lasers, tick the projectors to include and pick each one's 6th channel: Blanking, Intensity or LTC.
- Set the Content: Sample rate (48 kHz or 96 kHz), Music, Timecode (LTC at 24, 25 or 30 fps), Video.
- Choose the Container: MOV, MKV or WAV files, with 24-bit PCM or FLAC (FLAC needs MKV).
- For video, set the Picture: codec (HAP, HAP Q, ProRes 422, ProRes 4444), size, frame rate and Background. HAP needs MOV.
- Under Output, choose the Folder and File name. The name can use
{timeline},{date},{time}and{rate}. - Click Render now or Add to queue.
Export a show package
- In the same dialog, set Export as to Show package (.xshow).
- Set Show name (the timeline's name by default).
- Choose the timelines, lasers and content as above.
- Tick Publish to Cloud Library when done to upload it when it has rendered (a new revision if it was published before). This needs you to be signed in.
- Click Render now or Add to queue.
The package holds the mixdown, the laser output mapping and a thumbnail. To turn a finished mixdown into a package, use Render → Package mixdown as show…, or Package as show… on a finished job.
The render queue
Render → Render queue… (or Render queue on the Timelines page) lists the jobs.
Jobs start as soon as they are added (Background), or wait for Start (Manual). At once sets how many render at the same time. A failed job's Log says why; Import back turns a finished mixdown into a timeline.
Import a timeline
Import timeline… on the Timelines page makes a new timeline from:
- a multichannel laser WAV (a laser show stored as audio);
- a Live Alchemy mixdown;
- a show package.
Each laser becomes a track with one laser stream clip. The music becomes the timeline's music, with Audio (track drives playhead) on, and detected timecode sets Start TC.
For a laser WAV, the Import timeline dialog asks how to read it:
| Setting | What it does |
|---|---|
| Channels | What each channel holds: x, y (-x/-y mirrored), r, g, b, l (blanking), aux, left, right, _ (unused) |
| Colour | 0 to +1 (audio DAC) or −1 to +1 (ilda-tools) |
| Spare channels | SMPTE timecode — set the position, Data (e.g. DMX) — keep as a file, or Ignore |
Import back on a finished render job does the same with that mixdown. Its clips are Pre-rendered: they already have their zone geometry, so they play as rendered.